Saturday, April 23, 2022

Chicks are Pullets - 2022

 The chicks are, mostly, pullets now.  Their heads are getting feathered, and the older ones are in the garage without any heat.  They should be ready to move outside next weekend. I have a few chicks that are a week younger and they may need an extra week, or I could put the brooder warmer into a coop outside for a week to help them adjust.  We had three families purchase 18 of the chicks. That leaves us with 15 to figure out which to keep and which to sell in May. 

All the meat chicks survived. They are almost two weeks old which is good.  They are growing fast.  Little porkies.  Will need to stop feeding them at night after Monday to help with a better growth rate to cut down on them out growing their leg strength. 12 hours of eating per day so that they don't get too big too fast. 

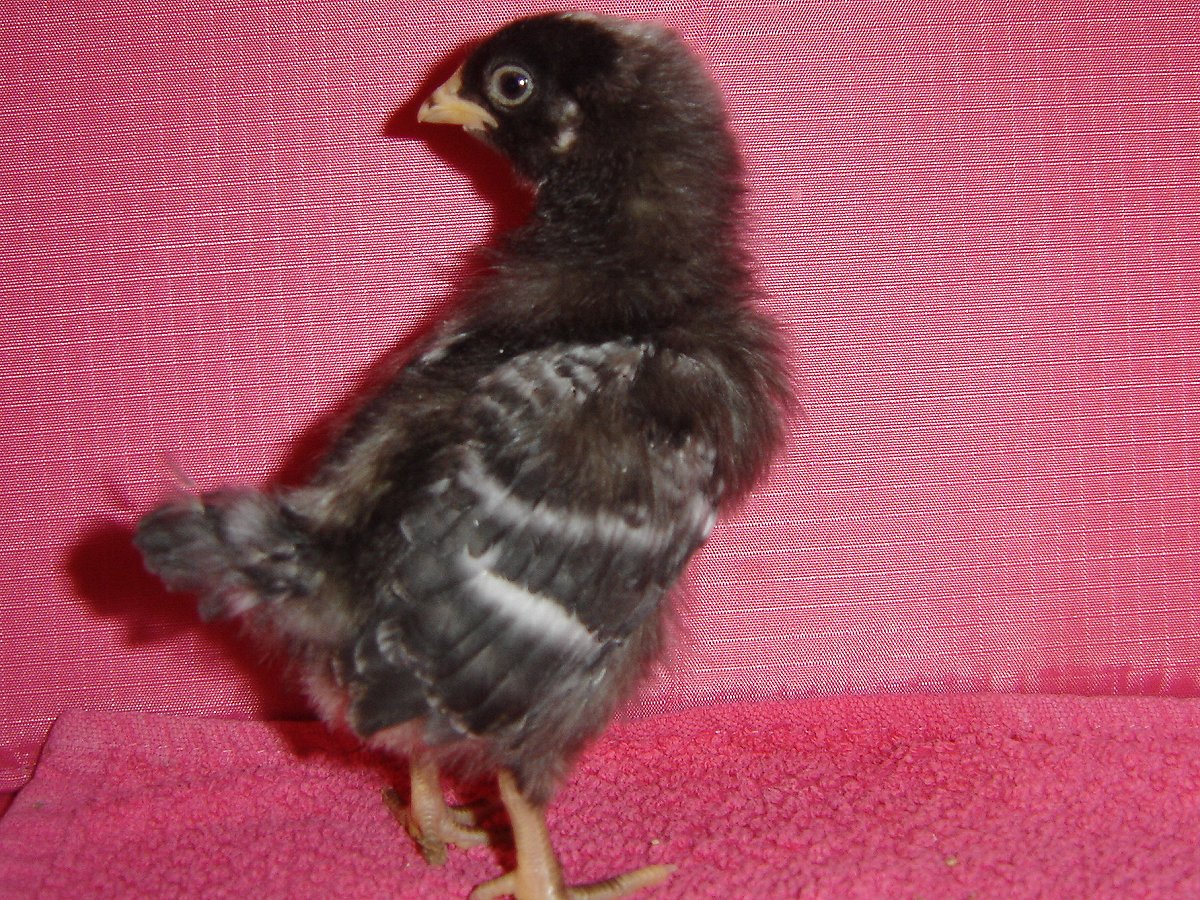
Younger Australorp
Bigger Australorp
Barred Rock six wks
Black Copper Maran
Easter Egger
Another Easter Egger
Lavender Orpington
Rhode Island Red
Silver Laced Wyandotte
Welsummer
CornishCross 2wks
6 week old pullets with 5 weeks old pullets
6 week old pullets in pen (in garage)
Pullets - six weeks inside pen in garage


Monday, April 11, 2022

Snowy April 2022?

Now this is frustrating.  Planted all our trees (fruit and Christmas stock), berries and grapes a few weeks ago only to have freezing and snow happen!  Not sure what all we'll lose.  Hoping we won't lose them all. Ratz! 

Sunday, April 3, 2022

Spring Chicklet Update 2022

 This is a photo of the chicks in their brooder with hemp shavings.  It lasts longer, smells better, and easier to clean! We had doggie pee pads down under it, but now that the chicks are getting older, they are more curious and peck at everything. Switched over to kraft paper to line the floor under the shavings. While I can tell them apart, it may not be so easy for the untrained eye. There are Barred Plymouth Rock, Australorp, Welsummer, Rhode Island Red, Easter Egger, and Silver Laced Wyandotte in the brooder. 

The younger chicks (one week younger) are in a large box still, but not for much longer as they will start flying around here too. They are not yet on shavings, but will be in a few days.  They are Lavender Orpington, Black Copper Maran, and two more Australorp. They can't hold their own yet with the older birds. So for now, they are their own little flock.  As they get taller and faster, they will be added into the larger flock. 

March 21 2022 Chicks Orpington, Australorp & Marans

March 14 Chicks Plymouth, Rhode, Easter, Wyandotte, Australorp, & Welsummer

More March 14 Chicks

Another of the March 14 Chicks


Sunday, March 27, 2022

Spring Chicks March 2022

 It is spring chick time. I ordered 25 chicks for myself and others, then some special orders came in.... We picked up three more after we lost three of the first 25, and then picked up eight more today. Wheeee! So we have 33 in total as of today and hoping no more die.  The breeds are the traditional Barred Rock and Rhode Island Reds, plus Welsummers, Australorp, and Easter Eggers.  Picked up Silver Laced Wyandotte, Lavendar Orpingtons, and Black Copper Marans for special orders. So, we have our hands full of Chick Pooh, Sheets, Hemp Shavings, Special Warmers, Organic Feed, and Lots of Water. 


Barred Rock
Plymouth Rock
Black Copper Maran
Black Copper Maran
Easter Egger
Easter Egger
Lavender Orpington
Lavender Orpington
Rhode Island Red
Rhode Island Red
Silver Laced Wyandotte
Silver Lace Wyandotte
Welsummer
Welsummer
Black Australorp
Australorp


Sunday, November 14, 2021

New Experiment - Hemp Bedding for Chickens - 2021

 As anyone who uses wood products knows right now, the price of it keeps rising substantially. Last year, I paid $11.99 for a bale of aspen wood shavings (compressed to about 50L) that weighed about 20 to 25 pounds, if I remember correctly.  Now it is almost $30 for the same sized bale. A bale typically lasts me about two months.  I stocked up last spring when I noticed that the prices were increasing, but apparently, the prices have not stabilized at this point.  I go through a lot of shavings when I'm brooding chicks so a bale only lasts me for about a month while I use about half a bale per month in the coop. 

A lot of people use the less expensive pine shavings or fir shavings. BUT, I refuse to use any other type of wood shavings because of the smell/toxicity factor.  

While many people who raise chickens swear by the large grain sand; our coop design, being a tractor pull, can't handle the weight of the sand, and I don't even think it would stay inside on the coop floor without a special fitted tray. So.... doing my research, I wondered about hemp bedding. 

According to this well written article, they can't try the hemp for legality reasons, but it may be the next best option for us as long as there is no mold or smell to it.  Hemp bedding is about half the price of the aspen shavings at the moment.  

IF I don't like it, I'll make the switch to straw, even though I have never liked dealing with straw. On the positive side, the hemp, like straw, is more biodegradable than the wood shavings, (wood shavings take a couple of years to fully break down so I can't directly add them to my compost pile). That would be sweet to be able to throw the hemp materials into my compost pile loaded with the chick pooh. Comparison of Chicken Bedding


UPDATE March 2022.  The Shredded hemp is working very well.  It's a bit finer than the aspen shavings, and has a distinct odor, but not overwhelming, nor bad.  It is very absorbent and spreads well.  Although the price is steadily rising, so is the price for the aspen shavings.  The hemp lasts longer.  I can get by with using less because it is more absorbent. In the baby chick brooder, I am using "puppy pee pads" under the shavings, and that is helping to protect the wood flooring better. So far and first week in, it has been very good. 

Thursday, September 30, 2021

Kelp Meal and Feather Plucking

This past year is the first time I have ever had to deal with a hen that pulls out her own feathers and was not broody at all. She was actually still laying eggs but she was looking very ragged. She started plucking the feathers last January/February when we had the snow storm and deep snow, and she never stopped plucking herself.  We never needed to pull her out of the flock for broody behavior. Several of the other hens also started to self pluck after she started, but they stopped the plucking behavior after we switched feed. The one hen was the only one left doing it. 

Rhode Island Red Hen - Chest Plucker

Reading more about nutrition, feather plucking and bullying, on a couple of sites, it was recommended that we add kelp meal and some protein to their diet. Rather than just switch all at once, first we stopped using the Layer pellets and went over to the Flock Raiser with more protein but no calcium. We started supplementing with calcium on the side. We had some really crazy extra calcium deposits on the eggs for a while, but that settled down and it rarely happens now. This actually works better because we can have the pullets in the pen at the same time. They do go through a lot more oyster shell/calcium supplement than before, but it is cheap. So that seemed to work for the other few that had also started to eat feather. They stopped pulling out their chest feathers, except for the one hen. So we figured we were on the right track, but was just not enough of something for the one hen. 

So the next thing I tried was putting "No Pluck" on her chest. That also helped, but did not stop the behavior all the way.  Some of the feathers would grow back in, but the crop area was still bald and bright red. 

Eventually, I started adding organic Icelandic kelp meal in July.  I read that for poultry, this will add many micronutrients that act as a prebiotic. Another level of nutrients that can help with health and behavior. The recommended amount is 1% to 2% by feed weight. So that would be about 0.24 ounces of kelp meal for each pound of food. We add a small scoop that we measured to match the appropriate amount that we feed the birds a couple times per week. The kelp does not "stick" to the pellets, and basically just collects on the bottom of the feeder but they do eat some of it from the feeder tray.  

Icelandic Organic Kelp Meal

I don't know if the birds actually get enough of the kelp meal, as recommended, but there is a noticeable change in the feathers coming back in on the one hen who has been bald for so many months.  It took several months of the kelp meal supplement, but her feathers are filling in, even though it is moulting time for her. So I'll continue to add the kelp meal.  It does not seem to be harming them and their eggs are looking/tasting great. 

Rhode Island Red Hen Missing Feathers

Plus, now that it is moulting time, I am giving the hens a little extra kitty kibble (fish) and Black Oil Sunflower seeds three times per week to supplement a little extra protein since the nights are getting cooler again.  I know that the extra protein is needed for the moulting hens and since we still have layers in the flock, I don't want to change out the feed again since there has been a gradual improvement.

Hopefully, the feathers will continue to fill in before winter sets in. Here is an article about livestock and organic kelp meal with some research links. 

11/14/21 Update - While the majority of the feathering has filled back in, there is a vertical strip on the crop that she continues to pick at. I don't know that she will ever stop this behavior. She may simply do it like a person who chews their nails. Such as life. 

Tuesday, September 21, 2021

Raw Apple Cider Vinegar from Apple Scraps

 I have read so many different recipes for this that my head is swimming.  Some does and don'ts that might help.  I'll update this as needed.  This is my second year making my own Raw Apple Cider Vinegar (RACV) using apple peels, cores, and pieces of apples that I freeze and save over the year.  Most of our apples are the honey crisp from our trees, but also granny smith and fuji that we get from the store. I just save the peelings and pieces/chunks from any apples we have started to use, but didn't need the whole thing. I store them in a ziploc type of bag in the freezer until I have enough.  This recipe if for a quart jar, but my most recent batch is being done in a 5 gallon ceramic crock.  This should give us about a gallon and a half, or so. When done, I will strain the RACV into half-gallon jars and keep them stored in a dark location.

Make sure to wash/rinse fresh apples before peeling. Don't use any apple pieces that are starting to rot, are black, or moldy. Worm holes, bruises, etc. are fine. I don't even remove the stems or the seeds, personally. Just don't let the peels, et al. set in the refrigerator for days. Put them right into the freezer bag in the freezer. 

While fermenting or whatever they call it, a warm dark place seems to work best for me.  Not too warm, about room temp (68F - 72F).  I don't usually use jars.  But when I have, I keep them inside a brown paper bag to help with maintaining the darkness.  I don't use any metal on the jars.  I just use two layers of cheese cloth to allow for the release the fumes/gasses and rubber bands to hold the cloth in place. Try to check them daily or several times per week.  Some people stir or swirl the jars slightly to ensure that there are no apple pieces that dry out or get moldy.  In the crock, I use one layer of cheese cloth and a wet kitchen towel over the top.  I also use a dinner plate upside down to help weight down the apple pieces until they all sink and don't float any more. Again, stir every day or two, to help with making a more even break down of the apples. A batch using a quart jar will produce about two cups of RACV.

I am NO expert on this.  So here is an article that helps explain the process a bit better and why not to use this type of Apple Cider Vinegar for canning purposes. Another page about Apple Cider Vinegar with links to uses. 

I use my RACV for refrigerator pickling, but that process is not canning. I also use the RACV for making fresh mayo, in cooking/recipes, and for my chickens as a probiotic. 

The Raw Apple Cider Vinegar using Apple Scraps Recipe

8 oz of Apple scraps (yes, I weigh them)
2 Cups of Water (unchlorinated, distilled, or let the water set for a day or two before adding to the jar)
2 Tablespoons of Honey (sugar works... brown, white, raw, etc.) 
4 Tablespoons of RACV (Braggs will work) I shake up the bottle to ensure that the mother is all broken up and distributed in the jar before I measure it out.  A lot of recipes do not include this. I do. 

Sterilize the glass jar and allow it to cool off. Add apple scraps. The scraps should fill the jar by about 2/3 or 3/4 full without being forced down. The water should be enough to cover the apples but NOT fill the jar.  That extra space is necessary in the process.

I mix the honey and RACV in the water before adding it to the apple scraps in the jar.  

Cover the jar with two layers of cheese cloth using a rubber band, and place the jar in a warm dark location (or in a brown paper bag on the counter, fold over and clip the top).  If using a crock, you can cover the top with a wet towel, and keep the towel damp during the next few weeks. 

Check daily or at least every other day to swirl/stir.  If any dark film starts to form at the top, remove it and watch for any mold. This fermentation process usually takes about two or three weeks and it is the cider process.  I wait until I see that the apples no longer float. 

When the scraps no longer float, you may notice a white film starting to form on the top of the water. That will be the mother. BUT, it may not form until later.  If it is already starting to form, scrape off the mother with some of the juice and set it aside. Strain out all the apple scraps, stems, and seeds.  You may need to squeeze them a little to keep all the RACV liquid for the next phase. Pour the strained liquid into fresh sterile jars, add the mother back in if you had any, and put fresh cheese cloth over the jars. IMPORTANT - Do not fill the jars to the top. Leave about two inches from the very top, or about an inch below the neck of the jar. Now we are starting the vinegar phase. 

Store the cheese cloth covered jars in warm dark location for another four to six weeks.  The mother should be fully formed  the top.  I check mine a couple times per week to ensure that there is no mold starting to form.  If you get mold at this point, you should not use that jar of vinegar (in my opinion). The jar may not have been sterile enough, or there may have been something that got in the jar that caused the mold to form. 

Now, for my big batch of apple cider vinegar this year, I used, as follows: 

6.5 lbs Apple Scraps
26 Cups of Water (6 Quarts + 1 Pint)
1+2/3 Cups Honey
2 Cups RACV with mother

I mixed them all up and poured them into my 5 gallon Crock. I could have gotten by with a 3 Gallon one, but I don't have that size. I used sterilized dinner plate turned upside down to press the apple scraps down under the water and picked out the apple seeds that floated to the top. Then covered the crock with a layer of cheese cloth, and the wet dish towel. Now to check daily and wait. 

5 gallon Ceramic Crock for Apple Cider Vinegar

A peek inside the crock