Sunday, April 25, 2021

End of April Garden Update 2021

The warmer temps followed by the cooler ones this week seemed to reset the growth stage for some of the plants. The mustard greens, spinach, chives, potatoes, and broccoli seemed to show the most growth this week. Go Figure? But I fixed our first spring salad with the mustard greens. Yay! The chickens love the mustard greens. 

Fingers crossed on the potatoes growing in the green house. Threw another layer of dirt on the Blue Potatoes.  They are only about a week behind the Red Potatoes.  I will pull the tarp off the square garden to get it prepared for the Russet seed potatoes next weekend. 

I have repotted some of the sweet bell pepper plants that have outgrown their start pots. So I think I will have at least four bell pepper plants survive for this year. The others are lagging behind. I can only do so much with that situation. But I'm not giving up hope just yet. 

The basil and tomato plants are in the greenhouse until we have more consistant weather.  I did leave the tomatoes outside last week when it was in the 70s. Now its in  the 50s. But we need the rain, so Not Complaining. 

Oh, yah, the clover that I planted out in the field last fall is finally coming up.  I assumed it died before it ever started. Yay!  

Enough positives this year to keep me more hopeful. 

Some photos from the "garden." 

New Garden Bed

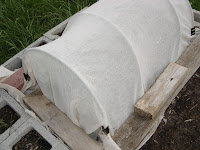
Broccoli Cover/Protection

Broccoli Growing Fast Now

More Broccoli Growing Fast

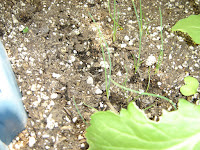
Garlic and Onions in New Garden

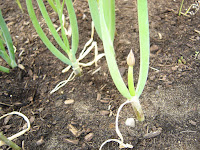
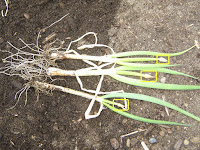
Supposed to be Red Bunching Onions

Wintered over onions want to Bloom Now

GreenHouse Plants
Mustard Greens

Chives next to the Mustard

Red Potatoes Left/Blue Potatoes Right

Tomato Starts Left / Basil Starts Right


Saturday, April 24, 2021

New Run and Chick Updates Spring 2021

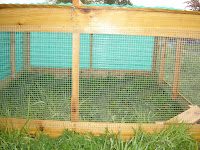
 A new build to allow us to handle more birds at once while raising the Cornish X. With the new federal regulations for raising Cornish Cross (Meat Chickens) expanding from 1.3 square feet to 1.5 square feet and the recommendation being 2 square feet per bird, we have upgraded our pen situation while making it easier to move. The pen is 36 square feet of outdoor space (enough for 25 meat birds at 1.5 sq.ft.), and depending on the size of a portable coop for cooler weather situations, can easily bump this up to 50 sq.ft. with a 4x4 basic outbuilding on skids. The reason the space can be this minimal is that the birds are to be moved to fresh pasture daily until they are processed. This would never be enough outdoor space for 25 layers even if you moved them every day!  While we had a 4x4 build for our turkeys, that only lasted a few years and we will need to build a better outbuilding. The last one was on the cheap and the siding/flooring started to get mold and rotting so the point it was no longer safe to use. We will, most likely, build it more like a "dog house" next time since we don't need the height for the meat chickens that we needed for the turkeys. 

The pen is built with cedar fencing 6', and 2"x2" pine support pieces. We plan to paint the wood to help it last longer. The roof can be flipped up or removed. The wired front lid can be unlatched for sliding/moving (these latches are locking hooks and screw-eyes). For now, the pen build. 

Run - Top Front
Run - Top Side
Run Front Wire Reinforced
Run - Side with Wire and Wind/Rain Panel
Run - Back Wind/Rain Panel
Run - Side Reinforced Wire & Coop Access Door

Screw Eye with Locking Hook Latch


This is a rendition of Lumnah Acres $30 Coop, which was built in 2017, and even then, those prices were lower than here in the PacNW. In this build, the wood was $70, the 25' roll of hardware cloth was $30, and the corrugated plastic roof panels were $38. Plus the hardware/fasteners about $10ish. We always use hardware cloth. We have coyotes that sit in our field and watch the chickens, hoping to figure out how to get at them. Plus there are frequent spotting reports of cougars in our area. Chicken Wire is No Match to these Hunters. For now, while we don't have a coop to use for the birds this spring, we will slide a pallet inside the pen at night so they can get up off the wet ground at the same time we are removing their feeder for the night.

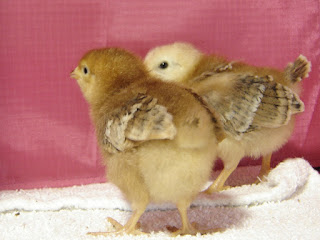
The Production Blue Roos and Pullets that we had hoped to have picked up this weekend are NOT ready for living outdoor in a coop.  One of the Roos has been slower to develop. While he finally caught up by size, he has yet to fully feather.  They are very pretty birds. The feathers on the front of their necks/chest have developed some hint of their Rhode Island x-breeding, while the rest of them look a bit more of the Blue Andalusian. The Pullets have a hint of black on their tiny combs (which will develop more later when they are ready to start laying eggs) while the Roos combs and waddles are a bit more developed, and pink/reddish. Their eye coloring is very pretty. I needed to pull them out of the brooder because I needed that space for the meat chicks at this point. So the Production Blues are in the large rabbit pen for now, while the brooder is dedicated now for the Cornish X Fluffballs. PS, I don't use heat lamps for fluffballs.  I use the warming plates inside the brooder and a space heater close but outside the brooder to keep the area temp from dropping below 60F.  The chicks will move back under or lay on top of the warming plates as needed without impacting their health or growth rate, similar to if they were being raised by a hen. So much easier than dealing with heat lamps. 

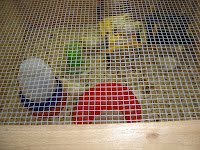
In the photos below, the meat chicks have two feeders at this point along with a one gallon water dispenser.  The small green feeder is what they started with.  During the first week, we grind up their start (feed) crumbles to make it a bit easier for them to eat in the smaller green feeder. That green feeder is there as an "assurance" to them now, even though it does not have much food in it. They will all gradually move onto the larger red feeder. But if we take the green one out too soon, they will panic and get stressed out. We do the same transition thing with the water dispenser. Silly Chicks! 

Production Blue 2 pullets & 2 roos
Stand Out Roo
Pullet - hint of Red Feathers
New Brooder Setup with Meat Chicks
Cornish Cross chicks 10 days old doing their thing
Gallon Water Dispenser Green Feeder and Large Red Feeder


Wednesday, April 14, 2021

Garden (mostly indoors) Update April 2021

 Most of our plants are either in the green house or in the house under lights.  Lost a bunch of tomatoes even in the green house.  The stalks/stems have greened back up, but I'm not certain any of the frosted ones will come back.  The survivors have a few curled leaves, but should be fine. 

Frozen Tomato Plants Look BAD

Surviving Tomatoes should be fine

Also in the Green house is the Mustard, Chives (same tub) and the Baby Spinach plants. The other half of that spinach tub is the second planting of spinach but has yet to pop up. 
Mustard and Chives in Greenhouse

Baby Spinach in Greenhouse

Also, my experiment with potatoes in the greenhouse.  Small give gallon grow pots with Red Pontiac potatoes (x2) and Blue Potatoes (x1).  In May, I'll plant the russets out in the garden box. 

Red Pontiac Potatoes in Greenhouse

Blue Potatoes in Greenhouse

Also in the green house are the dills that I wintered over. First off, I'm surprised that they even survived, considering that I could NOT get my dill to grow last year. So, this bounty is payback for last year's failed crop, I guess
Thriving Dill in Greenhouse


The plants indoors are waiting for better temperatures at night, so that I don't lose anymore plants.  I have some tiny starts of the marjoram and hoping they survive.  That is the second planting, and yah, they are difficult to start sometimes. Below is a photo of some of the Basil which have almost outgrown their little pots.  I have 11 plants this year. Much better than our Basil that we tried and tried to grow last year! 

Basil in House

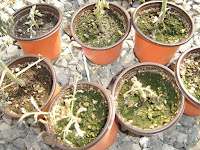
And the Sweet Bell Pepper Replants. They are looking much better than my last attempt. This time, after germinating, I planted at least two seeds in each pot so that I can cut back the ones that are smaller/weaker and keep the larger stronger. The first pot below is the Red Wonder, and the other pots are mysteries. There were five different types of sweet bell peppers in that seed packet. I'm kind of excited to see what we get.  The whole freezer and germination process got us this far. Read my Pepper post to learn more about the pepper germination process that I tried. 

Mystery Bell Peppers in house

Red Bell Peppers in house

Aside from my herbs that are already outside and have sufficiently wintered over, I have my peas outside.  These are the first sprouts of the snow peas. I plan to plant four seeds every two weeks until the middle of May. 
Snow Peas Outside

That's pretty much all the garden plants that I have that I feel confident about.  I do have onions, garlics and broccoli in the garden, but they are neither large nor looking great.  Perhaps in a month?  Will see. 

And today, we picked up our meat chicks.  25 cute little fluffballs. A 24 hours later update with sadness.  One of the cornish cross chicks had to be culled.  It had leg issues and could no longer stand on its own. 
Cornish Cross Chick Day

The other chicks that we started last month are ready to go to their new homes, while most of our pullets are coop ready, except for one. I might post photos of our flock as soon as they are settled into their new space.  Right now, we are working on the whole bonding process before we take them outside, where they will then solidify their pecking order. 

Saturday, April 3, 2021

Watching Chicks Grow into Chickens

The past couple of years, we have taken on a new adventure during the Covid Pandemic.  We started raising new hatchlings into young pullets that are ready to go outside. So we have had the opportunity to take weekly photos of them as they are growing.  For example, the Rhode Island Reds are a popular breed that we start for others. 

Week 1

Rhode Island Reds Week 1

One week after hatching, they are squatty little fuzz balls.  Apologies on the blurry photo, but they tend to move really fast at this age and are less likely to pose.  The first week or two, chicks are the most vulnerable to temperatures, stress, and crowding. When afraid, they tend to trample one another. They are also prone to a condition known as Pasty Butt, where the poop mats over their vent to their "butt down" and they can die if it is not removed quickly enough. Feeding them cooked/mashed egg yolks two or three times per week can help reduce pasty butt.  Also using a teaspoon of raw apple cider vinegar (like Braggs) in a quart of water for them to drink can help their immune system. They are just starting to get a few feathers on their wings, but for the most part, they are simply covered with down. These two are both pullets (females). They will grow way faster than you can ever anticipate, and within a few weeks, they will be creating quite the stink and cloud storm as they try to start to fly. But for the first week, or two, keeping them inside a house in a brooder is okay without too much of a mess. 

Week 2

Rhode Island Reds Week 2

Rhode Island Reds Week 2 wing and tail feathers

They are growing quickly. They have almost doubled in size even though they do not look like they have. They are much less prone to pasty butt after two weeks, but it can still happen, into their third week. They are still very squatty in appearance. Their beaks are growing stronger and may develop color on the tips, depending on the breed. They are growing more wing feathers, and they are starting to get distinct tail feathers. The interesting things about the Rhodes is that the color on their wings now is not what it will be in a few weeks. After two weeks of age, you can stop feeding the eggs with their feed, and start providing small amount of treats, like chopped up apple, mashed canned corn, or finely chopped broccoli, along with sand or very fine grit twice per week.  This helps them to become accustomed to these treats when they get older. (Not too much and not daily. It will mess with their development and egg production, if they get too fat.) 

Week 3
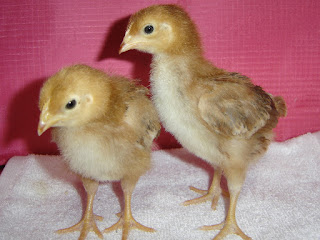
Rhode Island Reds Week 3

Rhode Island Reds Week 3 more feathers again

Now their legs are growing longer and they are starting to stand a bit more upright. From the front, they still look cream to tan in color, but when they turn around, you start to see the reddish color coming in down their backs, and towards their tail feathers. They are not as vulnerable to the temperature, but they are vulnerable as they attempt to fly. They can smack into objects and get hurt because they do not yet have the skills they need to fly safely.  They are ready for toys in their brooder.  A mirror or two, and a bell.  A colorful cat ball to roll around with a bell inside is also fun. A rope swing or a branch perch is also fun to try to fly up to, and fly off of. At this point, make certain to have plenty of floor space for your chicks. At least 1 square foot per chick to keep their stress levels down. Do no count the space that the food, water and other things take up in the square footage total. Not enough space and they may start pecking on each other. That's never fun to deal with. 

Week 4

Rhode Island Reds Week 4

Rhode Island Reds Week 4 Starting to get Red Feathers

At four weeks, they are better at flying with more sturdy wing and tail feathers developing. A lot less down on their bodies at this point, and they are starting to stand more upright, look a bit gangly, and hve quite the mix of down and feathers. I call this the long neck stage as they can really stretch out their necks now. But when they want to, they can look quite compact and squatty like little chicks. That's the nature of the 4 week old chick. Their heads are still mostly down and cream colored. But if you look closely, you see that feathers are starting to develop up onto their necks and down the sides of their chest to the tops of their legs. The true mahogany red color is filling in on their bodies.  Their flying skills are much more adept now, plus their pecking order is well established.  The dominant birds will be the first to fly or run towards you, while the less dominant birds will hang back in the flock.  They are able to eat small seeds and cracked corn as occasional treats now, as long as you include some grit with it. They also may like to experiment with dried meal worms that are not too large in size. Keep the toys in the brooder to give them distractions and to help the more timid birds to get some reprieve from the dominant ones. 

Week 5

Rhode Island Reds Week 5

Rhode Island Reds Week 5 Almost Fully Feathered

The first real resemblance of being mature chickens now. They are taller. Definitely more upright and almost fully feathered.  Their feathers are starting to form on their heads, but there is will some down on their chests, on the top of their heads, and a little around the top of their necks. This is really the last area on their body where they are not quite insulated enough to go outside, if your area is below 55F at night. You need to wait until those down feathers are really gone.  Once they are fully feathered, they are ready to live outside with a coop for them to sleep inside safely on a roost. At this point, my chicks are already sleeping on a roost in their brooder at night without a heat source in the barn, as long as the temps do not drop below 45F in the barn.  I have a small space heater near their brooder set to come on and warm the air around the brooder, if it gets too chilly, especially in the early spring. The chicks, as almost young pullet chickens, will need more floor space again.  At this point, they will need at least 1.5 square feet per bird to reduce stress levels and space to do their thing.  Yes, I get that sometimes, you will see them all huddled together, sleeping soundly in the corner of the brooder or side by side on the roost, but that is not a constant, buddy-buddy stance.  They need their space to exercise and act like chickens, too. 

Week 6 
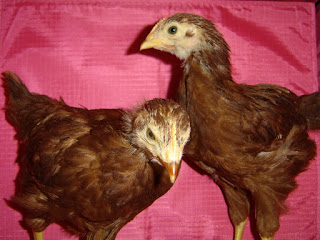
Rhode Island Reds Week 6

Rhode Island Reds Week 6 Almost Completely Feathered

The amazing transformation of the chick into a young chicken happens spectacularly fast. Their chests, sides, backs, wings, tails, and the tops of their legs are fully feathered now. Their heads are just about feathered with only a little down peeking through those new feathers. Depending on the weather outside, they might be ready to go live in their coop without any additional heat source.  If your nighttime temps are dropping below 45F and your daytime temps are consistently below 55F, then I definitely recommend that you include a heat source, whether it is a brooder warming plate, or a coop heating panel, for a couple of weeks. It is not a good idea to use a red heat lamp unless you have a very large coop where you can hang the lamp safely away from the birds and won't catch anything on fire. Until their heads are fully covered with feathers and they have had a chance to acclimate to the cooler temps, by being outside a week or two, you can then take the heat source away and they should do just fine, unless it starts snowing/freezing outside. That happens sometimes during mid-spring in our area. 
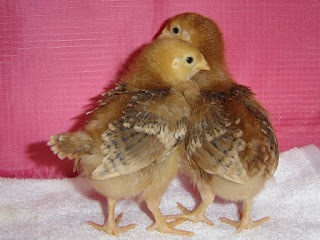
Personally, we don't use a heat lamp with our brooder chicks because we know of too many people that have lost their chicks and homes to fires caused by them. We rely on the brooder warmer panels to keep our chicks safer, warm, and healthier.  Our chicks are less stressed out because they use the panels to hide under when they get scared, or cold.  During the first week, we keep the food and water close to the panel. Week two, the food and water is moved a foot away from the panels. Week three, the food and water is moved totally away from the warmer panels. 

Our exception to the rule with Heat Lamps - For our meat chickens, during really cold or rainy periods, we will hang a low wattage red heat lamp inside the coop to encourage the birds to get inside and out of the elements since they seem a tad too dumb to figure out that it is warmer and dryer inside, without that light on. Luckly, our layers/hens are much smarter than that.