Tuesday, December 30, 2014

Hail Hath No Fury... and Frozen Eggs

Now that winter is officially in session, the fairly warm temps have dropped into freezy, frosty weather.  Sunday, we received a bucket load of hail out of the sky. The new hens, not having experienced this before were perplexed with the little white ice pellets. They kept trying to eat the stuff. The hail on the ground stayed the rest of the day since it was not warm enough to melt quickly. 

Then Monday, we had a beautiful warmer day, with sunshine and only a mild breeze all day until the cold settled in as the sun went down. The East winds picked up over night. Now we have real biting cold with east winds whipping through making it feel even colder. L and I picked up another outside extension cord to add a couple of small heat lamps under the waterers. We are trying to get by with just using regular light bulbs, plug in sockets, and lightweight extension cords placed inside of those hollow cement building blocks with the metal waterers setting on top of the block. The light inside heats the block from the inside, keeping the base of the waterer warmer. So far, it is a whole lot cheaper than two more of those of those fancy, eighty dollar heating pads. We keep these outside, far away from the coop to prevent any accidental fires.

Now get this.... The irony of it all.  Remember, we had planned on putting the older girls into our freezer for some nice chicken soup on these cold winter days. The three older gals are each laying eggs, almost daily now. All month, we begin receiving at least one to two eggs per day (about ten per week), which was more than what we were getting the month before. We received two eggs from them on Sunday, three on Monday and three more today (Tuesday). Go Figure! 

In actuality, all the hens are laying better now that it's been cooler. The daily production has doubled to approximately six to eight eggs per day.  We have had a few days over the past week with as many as nine eggs on one day and ten eggs a few days later. And with the super cold temps, we have been checking for eggs more often so that the eggs don't freeze and crack in the nesting boxes.


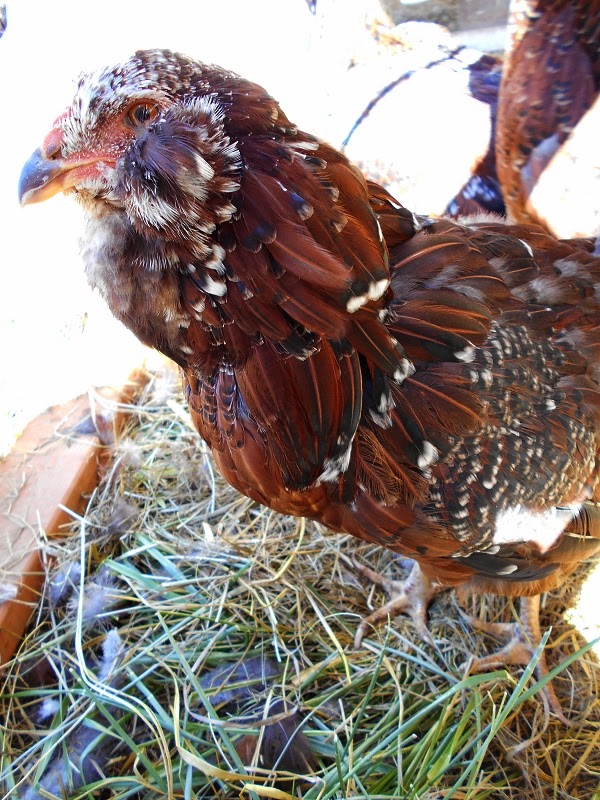
I had mentioned that we were going to split up the newer hens into two groups because we thought if we did this, it would reduce the number of eggs lain in the coop. We have three small coops going at once to ensure that each coop is easy to move and allows the hens to have plenty of access to grass, even though, at this time, it is a bit frosty. We have decided to name the coops as One, Two and Three based on when the coops went into action. Coop One has the older hens from last year. Coop Two has four hens from the "new" flock and coop Three has three of the new flock. Coop Two obviously has two hens who prefer to lay their eggs in various coop corners. Those hens have not changed their odd egg laying behavior. On the other hand, in coop One, the older hens like to squeeze together into a nesting box rather than wait or use the other available box. Obviously, we have some quirky birds... LOL 

We definitely need to put out a sign that we have fresh eggs to sell, because our customers are not currently purchasing enough to keep up with the supply. Or we need to start freezing the eggs for later use. I read that we can crack open the eggs, then kind of whip the yolks and whites up like we are going to scramble them, add a little salt and pour the mix into ice cube trays. Once they freeze, pop the cubes into a freezer bag and they should last in the freezer, safely, for at least six months to a year. But, as soon as the egg cubes thaw, the mix should be used within twenty-four hours. hmmmm... that certainly would help tide us over during the molting season next year. 

Thursday, December 18, 2014

D-I-Y 5-Gallon Bucket Rain Proof Chicken Feeder with Cover

Here in the Pacific Northwest, we get a LOT of rain. I was not finding any inexpensive hanging chicken feeders with rain covers or any rain proof designs that I wanted to tackle.  I decided to design my own.  I have not seen this exact design any place else online. If I have inadvertently copied someone else, I apologize. I would love to see other patterns to see if there is something that I could have done better,  I know that I have shared photos of the first five gallon feeder that I created.  I have crafted a second with a slightly different feeder layout.  I'm going to try the "bowl" effect with this one to see if it works better.  If it does not work as well, or better, than the last, I can cut it off and add the "red" strip feeder to the base.

DIY 5-gallon chicken feeder rain proof

I will include a lot of photos of the basic design showing the inside along with the steps I took to create it and the materials list. Most of the stuff I pulled from the garage and supplies I already had around the house. If I had to buy the materials, I think it would have cost about $15 total, for a new bucket, lid, brackets, signboard and screws.
  1. Draw lines on the outside "face" to create the opening making sure to do it between the two hanger brackets. Cut out the rectangle as one piece. Precision was not essential, but having fairly straight cuts is helpful. I left a two-inch lip from the bottom of the bucket as the feeder bowl. 
  2. Cut two one-inch diameter PVC pipe at 12-inch lengths. Score & cut the pipes length-wise to create channels for holding the signboard in place.
  3. Mark the inside walls of the bucket where you want the PVC pipes to attach and mark a line on the bottom of the bucket between the two wall lines to give guidance for lining up the angle of the PVC channel before attaching PVC to the inside walls of the bucket.
  4. Drill eight holes (four on each side of the bucket) slightly smaller than the sheet metal screws. Then align the PVC with the channel openings facing towards each other. Carefully mark each PVC to drill matching holes to line up with the holes just drilled on the bucket walls. Screw in the short sheet metal screws through the walls into the PVC pipe. 
  5. Measure the distance between the two attached PVC pipes and then add approximately one-half inch to that for the top portion of the signboard wall section. At approximately an inch from the bottom of the bucket, measure again between the two PVCs and also add an extra one-half inch to that measurement. The wall created with the signboard will look like a trapazoid, approximately one inch wider at the top than at the bottom. Draw and cut a template from the poster board first to ensure that it fits well in the channel before cutting the signboard. 
  6. You may discover that this portion is tricky because the poster board will be difficult to start or slide the board in the channel with the narrower bottom. I removed the three top screws from one of the PVC/wall, leaving the one screw at the bottom, to give enough flexibility to tilt the PVC inward for a slightly easier angle and board fit until the board is completely in place leaving a one inch opening from the bottom of the bucket. I carefully pull the loosened PVC back to the wall and look down the center of the PVC openings to see how the template fits inside. If all looks good, then remove the template to draw the trapazoid shape onto the signboard. 
  7. Using the same technique as above, slide the signboard into the channels. Gently adjust the board inside the pipes until both sides are even in the middle. Then carefully screw the bucket wall back into the PVC pipe. 
  8. For the rain shield, align two corner brackets on the inside of the bucket to attach the cut out wall section as the feeder shelter/cover. Inside the bucket, the rain shield area also serves as a place to put a counter balance weight after the bucket is filled with feed. I attached the rain shield with four machine screws and nuts. 
  9. Washed it all down with a 5% Bleach/95% Water solution to make sure it was all clean and ready for the chickens. Dried it off, filled it with feed, put on the lid and hung it in the middle of the chicken pen so that rodents could not get into it. 
Materials List
  • 1 clean five gallon bucket with lid
  • 1 1" PVC pipe at least two feet long
  • 1 poster board to use as a template for the plastic signboard
  • 1 plastic signboard approx 12" x 12"
  • 8 short sheet metal screws (#12 x 3/8" pan head phillips)
  • 4 machine screws with nuts (#10 x 5/8" round head combo)
  • 2 galvanized corner braces 1-1/2"
  • Large hacksaw or reciprocating saw or other means of cutting the bucket wall in one piece and cut through the PVC. 
  • Drill and drill bits to match screw sizes (I used a non-electric hand drill)
  • Pen that can mark on plastic
  • Phillips Screwdriver
From start to finish, if you have everything available at the start, the feeder takes less than two hours to complete. Having two people to cut out the wall piece and attach the signboard helps a lot! There are a lot of photos below that you can check on how it looks inside and out.  Good luck and have fun.
Inside look of  5-gallon chicken feeder bucket without lid
Inside look of feeder bucket without lid

Fill with Chicken Feed in this section of the feeder bucket

Attached Bucket Wall becomes a Rain Shield

Place Brick on the inside portion of the shield for counter balance when filled with chicken feed.

Five Gallon Bucket Chicken Feeder - front view
Front View

Left side of bucket - angle view
Left angle view

Chicken Feeder Right Angle View
Right Angle View

Bucket with Rain Shield - No Lid Attached
Bucket feeder with Rain Shield - No Lid Attached

DIY 5 Gallon Bucket Chicken Feeder with Rain Shield
Five Gallon Bucket Chicken Feeder with Rain Shield


Wednesday, December 17, 2014

Almost an Egg

The newer hens have upped their egg-sperience in laying eggs over the past month. Over the past two months, the seven hens were only laying a couple of medium sized eggs per day, and now we are starting to get three or four medium to large eggs per day, which is about the norm for this breed (approx three per week per hen). We assume that all are laying.  Some days we find three in the nest, and some days we find two in the nest and two in the coop. Even though we have two nesting boxes in the coop, they all want to lay their eggs in the one box, so I assume that a few are impatient and hunker down in a corner to pop out an egg. 

The recent eggs have been a good size for the most part, being over 50g with an occasional one or two per week being 43 to 45 grams while another one or two are closer to 58 to 60 grams. There's never been an egg that weighed more than 60 grams. But we have had a first with an egg being less than 40 grams.  The egg in the middle of the photo of eggs we received today only weighs 18 grams! I was shocked to see such an itty bitty egg from any of our hens. I hope this isn't a sign of her having a problem.

Less than a PeeWee egg between three Large eggs

Some articles online refer to these tiny eggs as wind or "fart" eggs. Some of them won't even have a yoke in them.  I cracked this little egg open and it had a little misshaped yoke. I cooked the egg and it tasted just fine, albeit, not very filling :^9 

I had mentioned in the last post that we were planning on putting the older hens in the freezer (so to speak) when, all of a sudden, they started producing more and we started selling more eggs.  The old hens have received a stay of execution for now.

Monday, December 8, 2014

Chill Over the Coop

Fall was not as cool as last year, but there have been some fairly cold nights and a few very frosty gusty days in November. Also, there were a couple of freezing rain  episodes and a few blowing rain that made for a few situations of rain in the coop and frozen door. But I think we have those areas fixed for now. Put a light on a timer in the new coop but the chickens keep knocking the light down from the outlet. Hopefully, we can figure out a better set up. 

Of the new hens, all seven get on the roost at once for warmth.  We have not put a heat lamp in the coop because it there should be enough bodies in there to keep it warm enough unless we start getting some long term cold.  One of the hens does not like laying her eggs in the nesting box. She's routinely laying her eggs in the coop on the floor. Yuck!  We're receiving about four eggs per day from the new hens while we are only getting one egg per day from the older hens.  We've decided to butcher the older hens for meat. Then we will split up the newer hens into two coops. 

The egg sizes are nice, between 47 grams to 58 grams. So we are getting plenty of eggs this year. 

Saturday, November 15, 2014

Early Polar Vortex 2014

Our area (as was a lot of North America) was it with an early Polar Vortex due to a big storm out in the Pacific Ocean. Not much snow, but a lot of wind, ice and freezing rain for us. The first day of the storm never got above freezing and we were caught somewhat unprepared since now we have two coops running at the same time.  The older girls' coop did not have any "technical" issues since we had gone through much of this last year with that coop style. Their A-frame pen area is protected from the North-East winds and the canvas tarp helps protect the coop level from the freezing rains/snows.The hens tend to stay in the protected area of the pen and are outside most of the day, even in freezing temps. They are fine with the temps. They hate the wind, though.

Older A-frame Coop with winterized features


As you can see from the larger view around the older coop, we still have patches of frozen ice pellets that have yet to melt, despite the temps warming into the 40s [F] today. The killer is our east wind that drops the air temps down below freezing.  You can't see it in the photos, but the plastic panel on this (east) side of their pen is actually still layered with ice.

Ice Pellets still on the ground despite the sunshiney day


The newer hens are still acclimating to the sudden cold temps. They have been voicing their complaints with chortles and short yelps. We purchased some clear vinyl table clothes to cover their run.  We have a long runner on there now that covers most of the pen.  We doubled up the shade fabric and have it along the north side (other side) to protect them from the wind along with a large white plastic panel over the gate to their pen which is facing the east right now.  What we did NOT anticipate was their access door to their coop being frozen open with about one-half inch of ice. After that happened, we have added a plastic tarp over that portion where the pen connects to the coop to keep it from happening again.  The younger hens spent less time outside during the storm.  I think that, with time, as they adapt to the east wind, they will spend more time out in their pen. They definitely spent a lot of time outside today since they get more "overhead" light in their pen with the very clear vinyl tarp. We have attached clips on the outside of the pen for the hooks on the bungee cords.  So far, the tarp has not blown off, so that's a Good!

Clear vinyl table cloth tarp for sunshine and protection


Monday, October 20, 2014

Whoops ~ She's a He!

Whoops!  Okay, so I guess I was right in thinking I might have a rooster this year. But when I realized we had a Buckeye in the middle of our young Orloff flock, I pushed my analytical observations aside, with the assumption that everything I knew about Orloffs would not necessarily come into play with a Buckeye pullet.

I sold the Buckeye along with my overload of Orloffs.  The spur buds had not gotten larger nor were the "tell" tail saddle feathers coming in. After all the photos that I had checked on Buckeyes, I sold the chicken  with the belief that she was a pullet but she was a bit "pushy" and my flock of Orloffs don't take kindly to that much pushiness.

Out of the blue I received a plea to help re-home one of the chickens we had sold four months ago.  Turned out that the Buckeye IS a rooster. I was advised that he got considerably larger recently and also started crowing at the crack of morning. He's going to be a beautiful Roo.

So, back to the farm came Beckyrue. Currently in quarantine and wondering "What Jus' Happened?"

Buckeye Rooster - 30 weeks
30 week old Buckeye Rooster
Rooster - Buckeye - 30 weeks
Buckeye - Rooster - 7 months

Saturday, September 20, 2014

No Tar with Those New Feathers

The hens are growing their feathers rather quickly now.  One of the gals definitely will have more spangles this year. With the feathers developing so quickly now, perhaps in a week, we won't even know that they were almost bald two weeks ago.

The "main" hen who thinks she's All That and More is back to attacking the hand that feeds her.  I had to kind of "return the favor" after she bit me hard enough to form a welt. She didn't think I would push her around with a backhanded swat to the chest.... That and a deep voiced "No!" seemed to let her know that she's not the top chicken in the coop. She still has a couple of straggly tail feathers hanging in. It could be that she's a little embarrassed by her less than perfect appearance. She's the hen in the front, closest to me in the middle photo as well as the last photo below.

The first two photos let you see the feather shafts and new neck feathers on the other hen who molted the most severely. You can hardly tell that she was so straggly little more than a week ago.

All in all, they are re-feathering nicely.

Russian Orloff Hen at 17 months - Neck is ReFeathering
Close-up Russian Orloff Hen at 17 months - Neck is ReFeathering
Russian Orloff Hens 17 months after moult
Russian Orloff Hen - Stubby Tail Feathers after Moult
Russian Orloff Hen - More Spangles in 2nd Year

Thursday, September 11, 2014

Some Feather Fill-In

Another update on the molting as changes occur.  The one hen that lost all the feathers around her neck and face is starting to get more feathers now. She really is a sight for sore eyes, and she almost seems angry that she's in the situation. But if you look closely (my apologies for the photo quality today) you can actually see the feathers sticking farther out of the little shafts and the feathers on her wings and tail are much longer today.
Wing Feather Fill In on Russian Orloff Hen

Last three remaining neck feathers

Other Russian Orloff Hen - re-feathering

Russian Orloff - Different stages of refeathers - Neck, Wing and Tail

Sunday, September 7, 2014

Other Things Happen around McCackcaul farm

The de-feathered hens are receiving a handful of mature mealworms a couple times per week. But they are not eating ALL the mealworms. Some of the worms are turning to pupaes then beetles, so the circle/cycle moves around with time. I keep each group separate. The pupaes, as they form, I pull out of the main tub and put them into a little container inside of the tub. I do this to keep the air the same moisture for the pupae, but the container gets checked once a day for newly hatched beetles. Beetles are placed into a fresh tub for breeding for about a month, then they all are pulled out and fed to the  chickens as a tasty treat. This way, no beetles eat up the newly forming larvae (mealworms).  :) When the mealworms get to their mature size, they sound INTENSEly like a bowl of rice crispies with a cup of milk.... They are eating/pooping machines that produce a lot of castings which end up on my garden.

Speaking of garden, the tomatoes are ripening to the point of needing to share the bounty. This was a great year for them. We have three types growing in five gallon buckets on our back deck.  Having them close to the house keeps the deer away.  In one of the photos is a shot of my little garden plot with a kind of futureistic cover surround to keep bunnies, deer and goats out. Too bad it doesn't keep out the slugs... ugh! But, the slugs don't get into my tomato plants!


Full Grown Mealworms

Pupae ready to hatch into beetles
Beetles ready to mate

The Giant Tomato that looks more like an apple
The Giant Apple Tomato

Giant Belgiums Ripening

Green Giant Belgium

Bonnies - look like large Strawberries

Lots of Sweet Mojos

Heavy Branches hang down to the deck

Fresh Picked Tomatoes

Fresh Sweet Mojos
And those are just some of the other events happening on our itty bitty farm.

Mir-egg-ulous

Just as miraculous as the development of the feathers on a chicken is the development of an egg! The pullets are heading into their egg development stage. We have our first egg from the new batch. Smaller and with thinner shells, the new eggs taste just as egg-cellent as our others. Here's a photo of the new egg compared to the eggs we received from our first chickens. The one in the middle is not as big around nor as heavy as the two on either side.  Pre-moult, one of our hens laid "short squatty" almost white eggs while the other hens lay longer, skinnier eggs that are a pale beige color.

Once the pullets are all "laying" we will start adding oyster shell shavings to their diet and take them off the higher protein developer food and onto a low protein supplement known as layer pellets. That will probably be in a week or two.

For now, we have only received two eggs from the new group after twenty-three weeks. Yay!
Older hens' eggs vs. newer hen's egg

Closer photo of the three eggs

Worse for Wear and Chicken Feathers in Development

Last Thursday, they didn't look worse, but after a very hot weekend, they have lost a lot more feathers. HOWEVER, I do see some feather tips pushing through the little shafts.

I wanted to learn more about how feathers develop in birds and came across an interesting article online.  "A feather develops from a follicle, which is found in the dermal and epidermal layers of the skin. To me, the way the bird’s skin cells are able to develop a large, primary feather, complete with shaft, barbs and barbules is one of those miracles of nature. While a feather is actively growing from the follicle, there is one artery and one vein that runs through the feather to support the growth. Once the feather has reached the full size, the blood supply is no longer needed and the vessels shrivel up. However, the follicle maintains a blood supply in the skin." (Quoted from  birdchannel.com) 

I was able to get a good close-up of this happening on the neck of one of the hens shortly before the all started pecking at the camera. So, one of the gals is hard hit by the new feather development, one is so-so, and the third is just now starting to lose her down feathers, but the majority of her feathers are still intact. You can see all three and their various stages below. 
Henny Henny in the middle of molt
Russian Orloff middle of molt Heading for the Rough Patch
Tail Featherless
More Feathers Moulted now
Most featherless of them all
Hanging on to a couple of feathers
Up Close Feathers in Development
Losing Down and not much more

Thursday, September 4, 2014

BeFeathered My Friends

So here we are, another week and still not much in the way of new feathers in place of the ones that fell out. The fall-out has slowed down a lot! But the replacements are slow to arrive. One of the hens is either going through a very light molt, or she's going to be doing hers later. She is the first photo. The rest of the photos are the two who have been most impacted by the feather shed. It's interesting that they didn't lose feathers off their heads. At least not at this point. I want to keep posting photos weekly to kind of get a comparison of how they are doing one week to the next until the molting is done.
Orloff Hen minimal molt damage
Other Orloff Hen with a lot of molt
Orloff Hen - major molt patches
Orloff Hen Molt - top view
Orloff Hen molt - front view