Friday, August 14, 2020

Almost 3 week old Chicks - August 2020

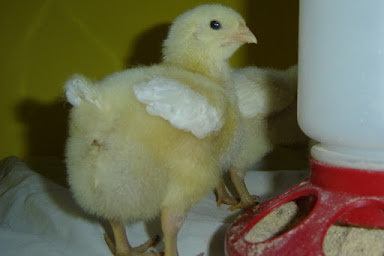
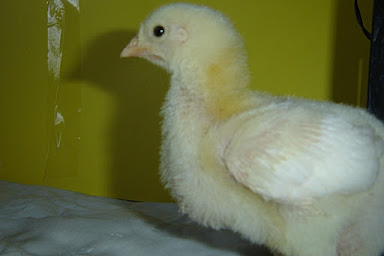
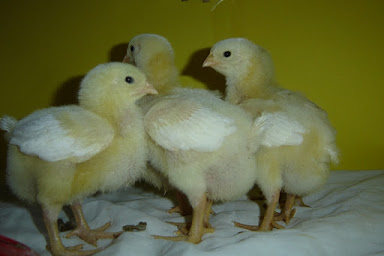
We have had the chicks two weeks now, although they will be three weeks on Sunday, August 16 and Monday, August 17.  The Cornish Cross are almost ready to go outside, but we are going to have a heat wave this weekend and into next week, so we have to wait until that passes before they go outside.  They have no true way to regulate their body temps and they are prone to heat stroke on those hot days. By next Friday, they will be outside until they are old enough to process. 


The other chicks look so tiny in comparison. But they are only a day or two younger. We lost one of the Blue Plymouth.  She didn't eat or drink very well.  It happens. We have had more problems with that this year I think due to the overload on the hatcheries trying to ensure that they are getting enough chicks out.  It is not uncommon for them to sell those chicks that are not as healthy as they could/should be. Unfortunately, that's what happens when people start panic purchasing livestock. The remaining 14 seem to be doing okay.  

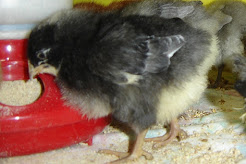
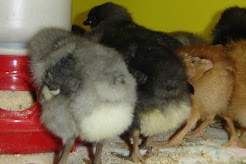
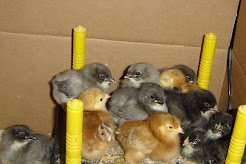
We did do a bit of nursing on one of the Blue Plymouth yesterday after it got tangled in one of the threads on the flooring.  We attempt to keep a close watch on them, but things happen from time to time. Thankfully, we seem to have caught it soon enough and after some extra attention, it perked back up and appears to be eating and doing fine now. I put an ankle bracelet on it so that I can keep an extra eye on how it is doing. I'll cut off the band in a day or two to let it blend back into the group.  She is the gray chick in the first column, third down and bottom, of photos below 

Two weeks in, and today was transition into shavings day. New process is always a big transition for little chicks, but they have all settled into the new environment after a few moments of distress, back to EPS (eating, pooping and sleeping). 


Wednesday, August 12, 2020

Happy Layers August 2020

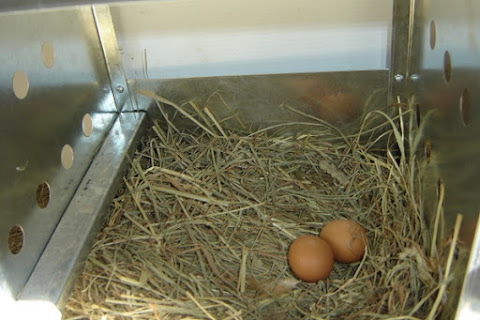
The past week we have been getting 4 eggs per day from our six young layers. Three of the eggs are brown, while one is a pale beige, similar to the Orloffs that we had. It might be one of the Barred, or it might just be one of the Rhode Islands laying a lighter egg.  I have had that happen before. They were all laying in the one big box that I had temporarily stationed in their coop, but I didn't want them to feel as though they had to share that much. When a girl's gotta lay, she wants some privacy. So the new nesting box was a bit of a test with two nice sized spaces available, would they use both? Yes, they did. I picked up two eggs from each box today. One of the Rhodes was standing on the perch and seeming quite proud of the new boxes in her space. Some happy layers today. 

New Nesting Box
Box in the Coop with 2 days worth of dust

Boxes tax the floor space!

2 Eggs in the right box

2 Eggs in the left box


Tuesday, August 11, 2020

How to Assemble (DIY) Harris Farms Nesting Box (Hint ~ The instructions are almost useless!)

 It took me 2 hours to assemble the nesting box by myself with a phillips screwdriver and 8mm socket wrench. The instructions are semi-understandable but they leave many of the fine details out. So I will explain some of those for you. The images can be clicked on to enlarge.

This guide is for the two nesting box metal version, but I'm assuming that the others are not too much different. 

1) Have some WD40 or some other synthetic lube handy to help start the nuts on the bolts. They are locking nuts with nylon inside, and on occasion, some of the nuts are rusted. The nuts are described as being 5/16". 

2) Count the nuts and bolts (aka screws). There should be 28 short bolts, two longer bolts and 30 nuts. 

3) They will recommend that  you "finger tighten" the nuts, but with the nylon on the inside of the nuts, that's next to impossible.  Using a screwdriver and wrench, I just didn't quite tighten them all the way until almost the very end. 

As instructed, do attach the divider panel and outer panels to the back piece at the bottom.  I chose to have the bolt head on the inside the box with the nuts facing out on the back.  The bolts are a bit longer than necessary so there is some sharp portion exposed, and I wanted those to face away from the chickens, especially on the ones that don't get covered by the base/floor. The example below is when it was almost finished, but is a good example of how much of the bolt is exposed. I wanted as many of those facing away from my hens, as possible. 

Nuts exposed on back side of box
 

4) After getting the side panels attached to the back piece, now you need to attach the front panel. It is not totally clear if the side (bar) holes should be near the top or bottom.  Place them near the top with the metal lip facing away from the box. I did put the bolt heads on the outside with the nuts on the inside of the box on this portion. My hens like to push far back into their boxes so I felt that this would be a relatively safe choice. This next photo, again is showing more than you need just yet, but you seen the lip is facing outward, and the bolt head is also outside the box, opposide of the ones on the back panel. 

Example of front panel connection to side panels.

5)  Remember don't quite snug everything up just yet, just tight enough to be stable. It's times to attach the long perch bars on the inside of the box. These look like U shaped bars a short piece that will stick out through the holes on the front panel. They should be "mirror" pieces that look the same but with holes drilled on opposing sides of one another. It is not real clear which goes on which outer panel. The image above actually will give you a good hint. The U should be facing downward and the holes should align with the outer panels.  Insert them from the back side and slide the short section through the front panel holes. 

Example of long perch bar installed on side panel.


6) The short perch sections are the folding part of the nesting box perch. I think those are pretty self explanatory based on the picture below.  Use the short bolts to attach them to the long perch bar BUT don't over tighten, or at the very least, use a washer before attaching the nut so that you will be able to lift the perch upwards, to "close up" the nesting boxes. 

Connect short perch bar to long perch bar.

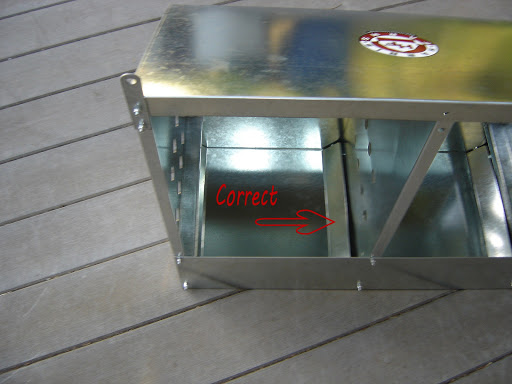
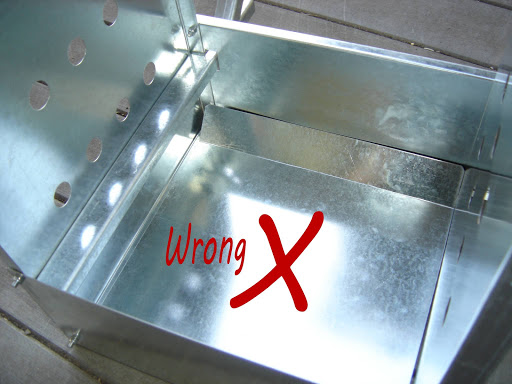
7) Attach the perch to the folding perch bar with the longer bolts. I will alert you that the flooring in the example here is WRONG!  So don't follow that portion or the bottoms will fall out unless you have the nesting boxes setting on the floor of the hen house. But the example for the Perch is correct. You can tighten the wood perch to the perch bar since there won't need to be any adjustments after this point. 

Attach Perch wood to short perch bar.

8) Now it is time to attach the top panel. While the instructions will suggest that now is the time to insert the floor sections, I don't recommend doing it until you have the top panel on. Another recommendation is that you attach the hanging brackets last.  It is much harder to attach them last if the front portion of the top panel is all attached and in place.  

Instead, attach the hanging brackets and the top panel on the back by laying the box on its side so that you can angle your screwdriver/socket wrench up under the top panel. As you can see in the example below, I was able to push the front portion of the top out to give more room in the top steepest angle from the back.  I also secured the center/divider panel to the top back in this same way before moving to the front.  I continued on the same theme of bolt head inside, nut outside, but that's not necessary if you want the top of the box to fit more snuggly to the wall. 
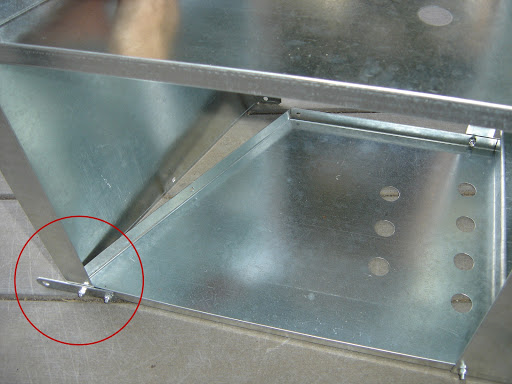
Connect Top panel to back side panel.


9) We're heading to the home stretch BUT things may get more challenging. Once you have gotten this far, you may discover more difficulty in lining up the holes.  I ended up wedging a large nail into the holes to "enlarge" the openings a bit and helping to align the two pieces. I attached the two sides of the top panel, then attached the two front outer corners of the top to the front side panels. I encountered issues with the center panel with the top panel and well, yah, I gave up at the point. I tightened up everything else at that point, and I think it is about as good as it is going to get. 

Finished Box from back view.


Top Panel Attached back, sides, and front.

10) I put in the floor the correct way, and now we are off to install the nesting box in the hen house. Be sure to secure the nesting box with the brackets to a wall or 2x4, or something stable, because if the hens step onto the perch, it will fall forward onto them. 

Floor installed correctly.

Floor installed incorrectly.


I hope this helps you with a better assembly of the  Harris Farms Nesting Box!

Wednesday, August 5, 2020

Cornish Cross Peeps August 2020

We picked up the Cornish Cross a week ago, and in the flurry of events, did not get first day photos.  They are a week and couple days old now, developing feathers, eating like... well, Cornish Cross, and poohing up a storm! That's their nature. They are the "pig" version of chickens. They have grown quickly.  The order of eight got mixed up, and we only received five, but have ordered eight for the next batch to be delivered in September. While I would prefer to have them all done for the year, it is what it turned out to be. 

They are already double the size of the layer chicks, in their own special crate because they kind of overpower the little ones, and will be ready to be outside in three more weeks. 
The Little Squirt Cornish Cross 1 week

All by myself Cornish Cross 1 week

Most of the flock Cornish Cross 1 week

Pretty White Wings surrounded by Yellow Down


Tuesday, August 4, 2020

August Peeps 2020

We have changed to flock over into the large cage now. The box worked well for a few days to get them acclimated to the warmer, food, and water, but now they need the space. See the wing feathers forming, meaning that they are going to want to move and fly. A box just doesn't cut it. 

Piks included of the posterboard experiment.  I chose yellow for "bright-ness" We will see if this works, or if they just shred it.  I do have what I used last time, just in case. But for now, I think this will help to keep them inside the cage better until they are too big to squeeze through. 


Posterboardwalls
CageSetup_Secured?
A Tall Bar to Achieve
Blue Plymouth Chick 1 week
Blue Plymouth Chick 1 week old
Barred Rock, Blue Plymouth & Rhode Island Red
Barred Plymouth Rock 1 week old
Barred Rock 1 week old
Cute Chick Bottoms
Chicks Huddled
Rhode Island Red Chick 1 week


The Box Gang :)

Monday, August 3, 2020

August 2020 - Garden and Chick Updates

July weather definitely helped with our garden, although the last week of July was sweltering. I had to start protecting the tomatoes to keep them from getting sun scald. Aside from that, the tomato wind guard area seems to be working out fine.  While I had originally planned on setting the bell pepper plants in that area, it's just not wide enough.  I will need to rethink it if I do this next year. 


The cucumbers are FINALLY doing their thing.  The first planting didn't survive.  The 2nd planting barely survived, but I didn't think they would, so I did a third planting... they also survived, but we will see it it was too late to get any cucumbers from them. At least we are getting some cucumbers at this point. 


Acorn squash. First try. Finally starting to get female buds.  For about three weeks, there were only male.  I just read that as soon as the male flowers start showing up, to put a dose of fertilizer on the plant to encourage the females to form. Then watch closely, the color of the leaves.  Keep them from turning yellow by regularly feeding the plants. We will see how this turns out. 


Corn survived!  The last time we had a summer like we had in June, my corn did not survive the month.  This year, instead of trying to start them outside, I kept them in the greenhouse under a light and that seemed to do the trick. I pulled all the tillers off this year and this past week, have added a dose of bone meal to help with corn development.  We should have some corn in another couple of weeks!
 

All onion are pulled and most have been cut up and dried. Pulled enough bush string beans to freeze for three meals. Plan to do that with the corn this year, too.  

Have pulled most of the broccoli florets off to keep them from bolting. Cauliflower heads are finally starting to form.  I have not grown cauliflower since the 1980s. I can't remember how long it takes.  This has been a very LONG time, it seems. 

Bell peppers have been attacked by bugs this year.  They are doing better, but not as well as I would like.  I think it is also a weather situation. This photo is a Sandpiper pepper.  Curious to see what it tastes like. 

Basil replant took hold.  I normally can't get basil to come up in July because it is usually too hot by that time. But the June weather really took a toll on a lot of my starts. It will probably be a late August before I can start harvesting dill and basil.  I'll take what I can get. 

The Cornish Cross Chicks came in on Wednesday this past week (July 29).  The last batch of Rhode Island Reds, Barred Rock and the Blue Plymouth showed up on Friday (July 31).  Lots of new chicks and their cute little peeps are in the garage.