It took me 2 hours to assemble the nesting box by myself with a phillips screwdriver and 8mm socket wrench. The instructions are semi-understandable but they leave many of the fine details out. So I will explain some of those for you. The images can be clicked on to enlarge.
This guide is for the two nesting box metal version, but I'm assuming that the others are not too much different.
1) Have some WD40 or some other synthetic lube handy to help start the nuts on the bolts. They are locking nuts with nylon inside, and on occasion, some of the nuts are rusted. The nuts are described as being 5/16".
2) Count the nuts and bolts (aka screws). There should be 28 short bolts, two longer bolts and 30 nuts.
3) They will recommend that you "finger tighten" the nuts, but with the nylon on the inside of the nuts, that's next to impossible. Using a screwdriver and wrench, I just didn't quite tighten them all the way until almost the very end.
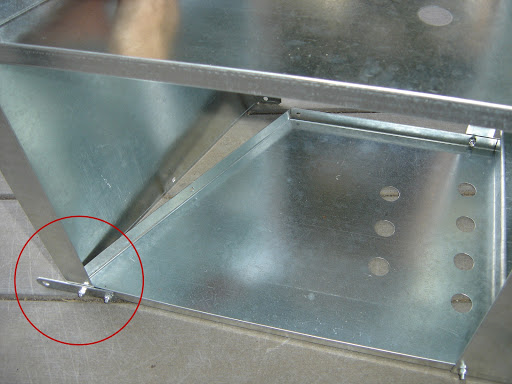
As instructed, do attach the divider panel and outer panels to the back piece at the bottom. I chose to have the bolt head on the inside the box with the nuts facing out on the back. The bolts are a bit longer than necessary so there is some sharp portion exposed, and I wanted those to face away from the chickens, especially on the ones that don't get covered by the base/floor. The example below is when it was almost finished, but is a good example of how much of the bolt is exposed. I wanted as many of those facing away from my hens, as possible.
4) After getting the side panels attached to the back piece, now you need to attach the front panel. It is not totally clear if the side (bar) holes should be near the top or bottom. Place them near the top with the metal lip facing away from the box. I did put the bolt heads on the outside with the nuts on the inside of the box on this portion. My hens like to push far back into their boxes so I felt that this would be a relatively safe choice. This next photo, again is showing more than you need just yet, but you seen the lip is facing outward, and the bolt head is also outside the box, opposide of the ones on the back panel.
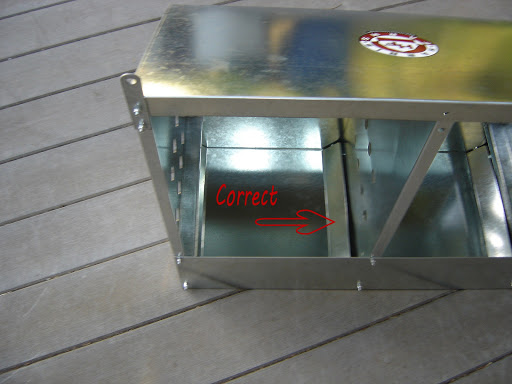
5) Remember don't quite snug everything up just yet, just tight enough to be stable. It's times to attach the long perch bars on the inside of the box. These look like U shaped bars a short piece that will stick out through the holes on the front panel. They should be "mirror" pieces that look the same but with holes drilled on opposing sides of one another. It is not real clear which goes on which outer panel. The image above actually will give you a good hint. The U should be facing downward and the holes should align with the outer panels. Insert them from the back side and slide the short section through the front panel holes.
6) The short perch sections are the folding part of the nesting box perch. I think those are pretty self explanatory based on the picture below. Use the short bolts to attach them to the long perch bar BUT don't over tighten, or at the very least, use a washer before attaching the nut so that you will be able to lift the perch upwards, to "close up" the nesting boxes.
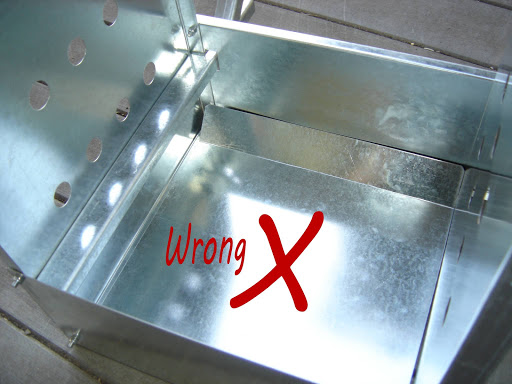
7) Attach the perch to the folding perch bar with the longer bolts. I will alert you that the flooring in the example here is WRONG! So don't follow that portion or the bottoms will fall out unless you have the nesting boxes setting on the floor of the hen house. But the example for the Perch is correct. You can tighten the wood perch to the perch bar since there won't need to be any adjustments after this point.
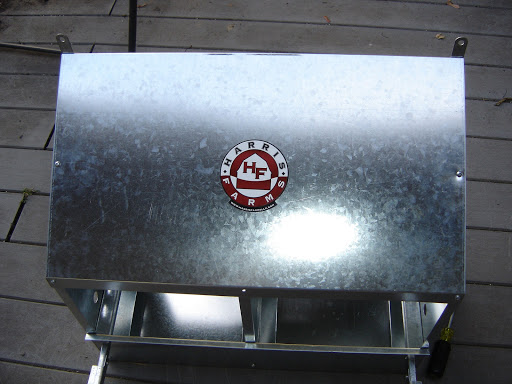
8) Now it is time to attach the top panel. While the instructions will suggest that now is the time to insert the floor sections, I don't recommend doing it until you have the top panel on. Another recommendation is that you attach the hanging brackets last. It is much harder to attach them last if the front portion of the top panel is all attached and in place.
Instead, attach the hanging brackets and the top panel on the back by laying the box on its side so that you can angle your screwdriver/socket wrench up under the top panel. As you can see in the example below, I was able to push the front portion of the top out to give more room in the top steepest angle from the back. I also secured the center/divider panel to the top back in this same way before moving to the front. I continued on the same theme of bolt head inside, nut outside, but that's not necessary if you want the top of the box to fit more snuggly to the wall.
9) We're heading to the home stretch BUT things may get more challenging. Once you have gotten this far, you may discover more difficulty in lining up the holes. I ended up wedging a large nail into the holes to "enlarge" the openings a bit and helping to align the two pieces. I attached the two sides of the top panel, then attached the two front outer corners of the top to the front side panels. I encountered issues with the center panel with the top panel and well, yah, I gave up at the point. I tightened up everything else at that point, and I think it is about as good as it is going to get.
10) I put in the floor the correct way, and now we are off to install the nesting box in the hen house. Be sure to secure the nesting box with the brackets to a wall or 2x4, or something stable, because if the hens step onto the perch, it will fall forward onto them.
I hope this helps you with a better assembly of the Harris Farms Nesting Box!


