Over the past few weeks, we have received a few larger than usual eggs. One was Extra Extra Extra Large weighing 3.2 oz. That's like the size of a Turkey Egg. I had read a piece recently about a large egg having another fully developed (with shell) small egg inside of it. So I kind of wondered if we had one of those. Cracked open the three larger eggs tonight, and they were all double yolked. That's all. Nothing too crazy :) But this most recent larger than usual egg was so big, we could not put the lid on the carton. LOL Yah, that big! Most of the eggs are still rather smallish. That might be why it seems so gigantic. Even next to the other two large eggs, it was still pretty large by comparison.
A bit of McCackle as I update what I learn and discover while trying to raise chickens and garden.
Sunday, September 20, 2020
Saturday, September 19, 2020
Crazy September 2020 - Is it October Yet?
The start of the month was any normal September. Too Hot, Too Dry, and harvesting crops. Then life seemed to start sliding sideways. Let's see if I can remember everything in the order by date.
9/4 Friday - Pickle Palace is Completed with a few fixes still to be done.
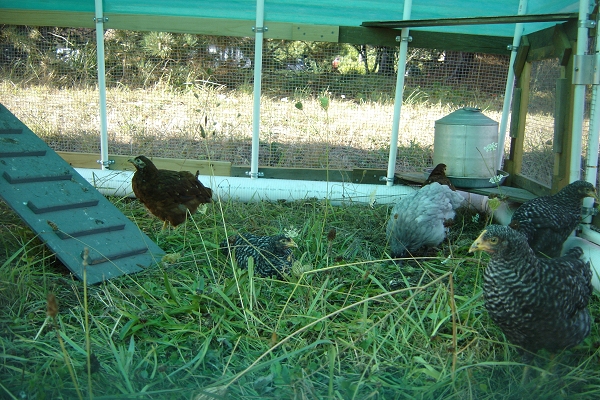
9/5 Saturday - Moved young pullets into their new larger coop/run Pickle Palace.
9/6 Sunday - Picked a bunch of cucumbers and pickled two batches in honor of Pickle Palace.
9/7 Monday - Huge windstorm. We had to chase down the hoop coop tarp and batten that to the run plus set up a wind block for the layers in their run. Next we chased all the birds into their respective coops, the Meats were eager to go into their little A-frame Coop, the Layers into their Hoop Coop and the Pullets into their Green Mobile Coop. The winds with gusts about 50mph in our area, from the N/NE, were strong enough to move/push the new large coop/run two feet south! It didn't lift it or flip it, so that's good. None of the fiberglass got blown off either. Lots of power outages from downed lines, broken branches and toppled trees. Up on Mt. Hood, the power grid was shut off to help prevent new fires. It would take almost a week to get it turned back on for everyone.
9/8 Tuesday - Fires across Oregon were pushed across hundreds of thousands of acres. More than a million acres were burning shortly after the windstorm, wiping out towns and forcing close to a million people to evacuate. The skies to the south of us were turning red with smoke as the flames were going everywhere possible. Picked up apples off the ground. Need to peel and freeze them.
9/11 Friday - Get Ready (level 1) evacuation zone on our back door step. Almost all of Clackamas County was under evacuation with about half of the county already at "Go!" (level 3) evacuation. This was mostly from the Riverside fire south of Estacada but the one unnamed fire that was just south of Barton was not too far from us on the other side of a small mountain. We were packing and preparing, but at the same time, our old cat was dying. Two weeks prior, she had been diagnosed with a heart murmur, hyperthyroidism, and kidney disease. The medication was apparently too late to help, and she was over 15 years old and ready to die. We tried to figure out also, how we were going to move 25 birds to a safe location. The air was so choked with smoke, we could not see the mountains anymore, the sun was merely a small orange ball in the sky, when we could see it at all, the air quality was the worst of any place in the world, deemed to be hazardous to breathe and stay indoors with windows and vents shut. Thankfully, it cooled off quickly outside, once the smoke took over, and stayed in the 60F range.
9/12 Saturday - Neighbors' wells were going dry or muddy, and on this day, the cat died, and the air quality was still toxic. On the plus side, the humidity in the air had increased and we were having more moisture (fog) at night and early in the mornings, which was helping contain the fires. The evacuation zones were slowly being pulled back. By the end of the day, we were no longer in an evacuation zone.
9/14 Monday - We were supposed to receive some rain, but that didn't happen. Now, the news is predicting thunderstorms on Thursday night (9/17). Smoke is still thick and it is impossible to do much of anything outside without, at least, a mask. Unfortunately, that doesn't block the toxins, but we can't get N-95 masks due to the pandemic. We dug a hole next to our apple trees and buried our cat. Our hearts, of course breaking. She is no longer in pain. Today is also meat processor day. We withheld feed (they can have water) from the seven week old meaties today and tonight they are being transported to the processor up the street.
9/15 Tuesday - Meaties are back and in the fridge to rest. The heaviest one is six pounds and the lightest is 4.8 pounds. Fairly decent weights. Smoke is still awful, but the evacuation zones keep being pulled back, little by little. The fire just south of us had been contained, but flared back up on the 13th, but is reportedly contained again. Barely any winds this week has helped a lot. Biggest fear now will be the thunderstorm coming from the south of us.
9/16 Wednesday - More meaties. We have eight this time (like we should have had last time). Have them all set up in a box with their warmer, water, food, and light. The store wanted us to take a few extra this time because some of their customers were unable to pick up their orders due to the fires. We could not help them out this time. One of the chicks has several brown spots. I have had a few Cornish Cross with one spot, but never had one with several spots. The other chicks, unfortunately, pick on its spots.
9/17 Thursday - Smoke is still thicker than fog. Thunderstorms have been moving up the valley, mostly to the west of us. Kind of assumed we would not get any moving over us. We moved the hoop coop and run and battened everything down, just in case.
9/18 Friday - At 3:30 am, the lightning was directly overhead, winds from the south were strong and that was no little storm. Hail, and sideways rain pummeled everything, while the lighting was striking every 5 to 10 seconds. The thunder was one continuous rumble, causing the house to shake. Power went out so we went around checking to make certain everything was secure. It lasted about an hour, perhaps a little longer, and then just rain. We got over an inch of rain during that time. It continued to rain, off and on throughout the day, and by 5:30 pm, the smoke was totally gone and the sunshine was wonderful to see once again. Just like that. The Pickle Palace did not leak or blow apart. The lettuce was shredded. A few branches broke off the tomatoes, but it wasn't as bad as I thought they would be. Bell Peppers were in a fairly protected area and seemed fine. Nothing broken. When I checked on eggs from the layers, we had six eggs (normally was getting four each day) and one was super sized!
9/19 - Today, the rains continued with occasional showers, then sunshine, then showers again. The tractor was used to pull the Pickle Palace. One minor foot injury to one of the pullets as they freaked out. Perhaps from the tractor, or from the pen being moved. Rounded them all up and put them into the coop before moving it any farther. Checked on the onion starts I planted a month ago. Not sure what is up with them. Of the 35, I have 11 left. Might be bugs, the smoke, or animals. On a positive note, the dill that I thought was going to be a waste of my time is finally popping up! Cooler Weather? Perhaps. Dug up the last of our potatoes (the purple ones) because they got wet in the storm. Don't want them to rot before we get a chance to eat them. There were not very many and were fairly small.
Let's just say, it's been a stressful two weeks. We Survived even through the loss!
Photos below.
Tuesday, September 1, 2020
New Coop in the Works
This has been named The Pickle Palace, for now, because it is long and shaped a bit like a pickle, with green fiberglass/corrugated roofing. The plan is to pull the pickle with the tractor across the field. The bottom will be hardware cloth all around and the door to the pen is also hardware cloth on a PVC frame.
Hopefully, it will hold up against the east winds that we have out here.
Friday, August 14, 2020
Almost 3 week old Chicks - August 2020
We have had the chicks two weeks now, although they will be three weeks on Sunday, August 16 and Monday, August 17. The Cornish Cross are almost ready to go outside, but we are going to have a heat wave this weekend and into next week, so we have to wait until that passes before they go outside. They have no true way to regulate their body temps and they are prone to heat stroke on those hot days. By next Friday, they will be outside until they are old enough to process.
The other chicks look so tiny in comparison. But they are only a day or two younger. We lost one of the Blue Plymouth. She didn't eat or drink very well. It happens. We have had more problems with that this year I think due to the overload on the hatcheries trying to ensure that they are getting enough chicks out. It is not uncommon for them to sell those chicks that are not as healthy as they could/should be. Unfortunately, that's what happens when people start panic purchasing livestock. The remaining 14 seem to be doing okay.
We did do a bit of nursing on one of the Blue Plymouth yesterday after it got tangled in one of the threads on the flooring. We attempt to keep a close watch on them, but things happen from time to time. Thankfully, we seem to have caught it soon enough and after some extra attention, it perked back up and appears to be eating and doing fine now. I put an ankle bracelet on it so that I can keep an extra eye on how it is doing. I'll cut off the band in a day or two to let it blend back into the group. She is the gray chick in the first column, third down and bottom, of photos below
Two weeks in, and today was transition into shavings day. New process is always a big transition for little chicks, but they have all settled into the new environment after a few moments of distress, back to EPS (eating, pooping and sleeping).
Wednesday, August 12, 2020
Happy Layers August 2020
The past week we have been getting 4 eggs per day from our six young layers. Three of the eggs are brown, while one is a pale beige, similar to the Orloffs that we had. It might be one of the Barred, or it might just be one of the Rhode Islands laying a lighter egg. I have had that happen before. They were all laying in the one big box that I had temporarily stationed in their coop, but I didn't want them to feel as though they had to share that much. When a girl's gotta lay, she wants some privacy. So the new nesting box was a bit of a test with two nice sized spaces available, would they use both? Yes, they did. I picked up two eggs from each box today. One of the Rhodes was standing on the perch and seeming quite proud of the new boxes in her space. Some happy layers today.
Tuesday, August 11, 2020
How to Assemble (DIY) Harris Farms Nesting Box (Hint ~ The instructions are almost useless!)
It took me 2 hours to assemble the nesting box by myself with a phillips screwdriver and 8mm socket wrench. The instructions are semi-understandable but they leave many of the fine details out. So I will explain some of those for you. The images can be clicked on to enlarge.
This guide is for the two nesting box metal version, but I'm assuming that the others are not too much different.
1) Have some WD40 or some other synthetic lube handy to help start the nuts on the bolts. They are locking nuts with nylon inside, and on occasion, some of the nuts are rusted. The nuts are described as being 5/16".
2) Count the nuts and bolts (aka screws). There should be 28 short bolts, two longer bolts and 30 nuts.
3) They will recommend that you "finger tighten" the nuts, but with the nylon on the inside of the nuts, that's next to impossible. Using a screwdriver and wrench, I just didn't quite tighten them all the way until almost the very end.
As instructed, do attach the divider panel and outer panels to the back piece at the bottom. I chose to have the bolt head on the inside the box with the nuts facing out on the back. The bolts are a bit longer than necessary so there is some sharp portion exposed, and I wanted those to face away from the chickens, especially on the ones that don't get covered by the base/floor. The example below is when it was almost finished, but is a good example of how much of the bolt is exposed. I wanted as many of those facing away from my hens, as possible.
4) After getting the side panels attached to the back piece, now you need to attach the front panel. It is not totally clear if the side (bar) holes should be near the top or bottom. Place them near the top with the metal lip facing away from the box. I did put the bolt heads on the outside with the nuts on the inside of the box on this portion. My hens like to push far back into their boxes so I felt that this would be a relatively safe choice. This next photo, again is showing more than you need just yet, but you seen the lip is facing outward, and the bolt head is also outside the box, opposide of the ones on the back panel.
5) Remember don't quite snug everything up just yet, just tight enough to be stable. It's times to attach the long perch bars on the inside of the box. These look like U shaped bars a short piece that will stick out through the holes on the front panel. They should be "mirror" pieces that look the same but with holes drilled on opposing sides of one another. It is not real clear which goes on which outer panel. The image above actually will give you a good hint. The U should be facing downward and the holes should align with the outer panels. Insert them from the back side and slide the short section through the front panel holes.
6) The short perch sections are the folding part of the nesting box perch. I think those are pretty self explanatory based on the picture below. Use the short bolts to attach them to the long perch bar BUT don't over tighten, or at the very least, use a washer before attaching the nut so that you will be able to lift the perch upwards, to "close up" the nesting boxes.
7) Attach the perch to the folding perch bar with the longer bolts. I will alert you that the flooring in the example here is WRONG! So don't follow that portion or the bottoms will fall out unless you have the nesting boxes setting on the floor of the hen house. But the example for the Perch is correct. You can tighten the wood perch to the perch bar since there won't need to be any adjustments after this point.
8) Now it is time to attach the top panel. While the instructions will suggest that now is the time to insert the floor sections, I don't recommend doing it until you have the top panel on. Another recommendation is that you attach the hanging brackets last. It is much harder to attach them last if the front portion of the top panel is all attached and in place.
Instead, attach the hanging brackets and the top panel on the back by laying the box on its side so that you can angle your screwdriver/socket wrench up under the top panel. As you can see in the example below, I was able to push the front portion of the top out to give more room in the top steepest angle from the back. I also secured the center/divider panel to the top back in this same way before moving to the front. I continued on the same theme of bolt head inside, nut outside, but that's not necessary if you want the top of the box to fit more snuggly to the wall.
9) We're heading to the home stretch BUT things may get more challenging. Once you have gotten this far, you may discover more difficulty in lining up the holes. I ended up wedging a large nail into the holes to "enlarge" the openings a bit and helping to align the two pieces. I attached the two sides of the top panel, then attached the two front outer corners of the top to the front side panels. I encountered issues with the center panel with the top panel and well, yah, I gave up at the point. I tightened up everything else at that point, and I think it is about as good as it is going to get.
10) I put in the floor the correct way, and now we are off to install the nesting box in the hen house. Be sure to secure the nesting box with the brackets to a wall or 2x4, or something stable, because if the hens step onto the perch, it will fall forward onto them.
I hope this helps you with a better assembly of the Harris Farms Nesting Box!